
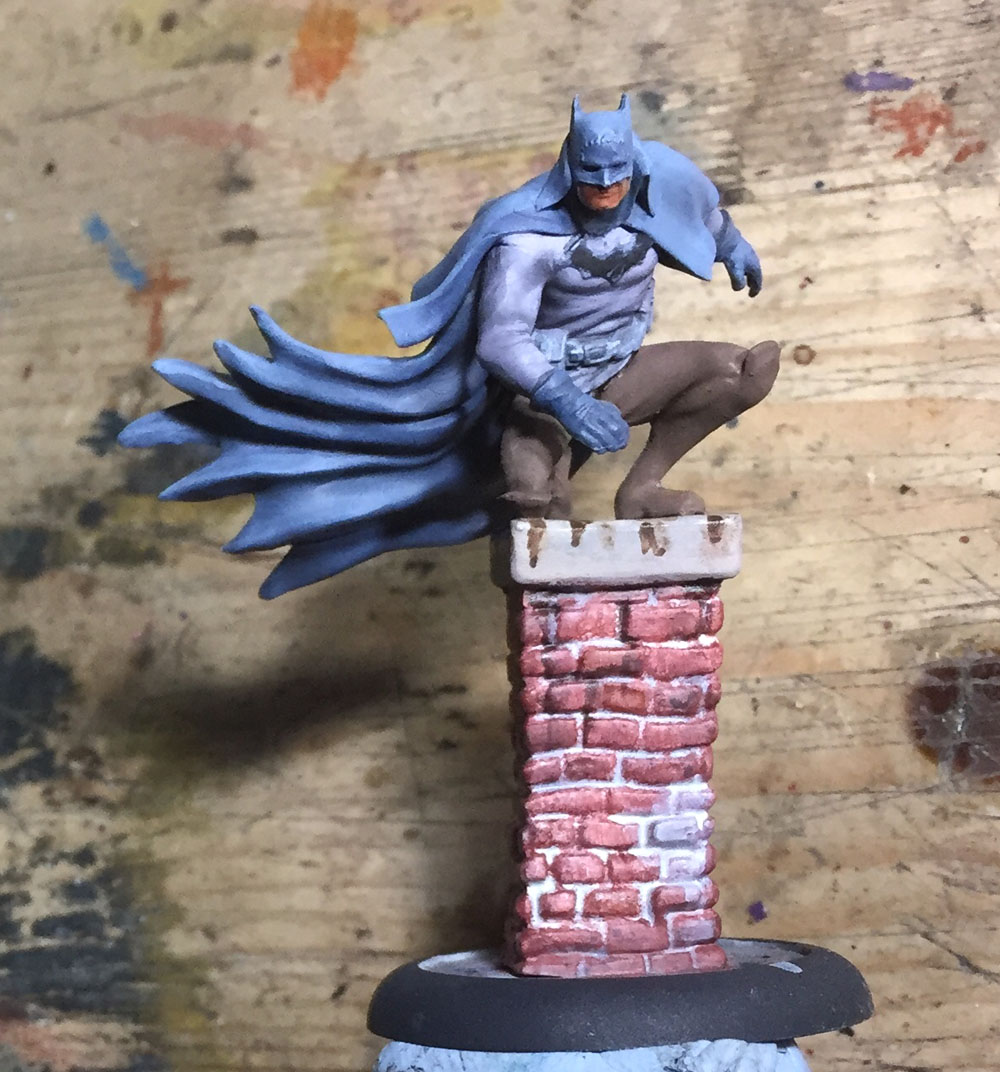
I saw this different colour scheme to the one used by Knight Models for their box art and decided to go with it instead.

I started off by giving Batman a zenithal prime using an airbrush, then a coat
of Vallejo’s Ivory to the chimney stack.
I didn’t have a suitable reddish brown for the brick colour,
for this I mixed some colours. I used Citadel’s Skrag Brown mixed with
Vallejo’s Burnt Red and then applied it to the bricks using a sponge in order
to get a nice texture and it rarely goes into the gaps between the bricks. The
sponge won’t get into the top of the stack so I used a drybrush to apply the
paint there.

The trousers were base coated with Scale 75’s Walnut, the
top of the outfit, let call it the jumper,
was base coated with Citadel’s Warpfiend Grey. The cape, cowl and gloves
were base coated with Russ Grey. Bat symbol was given a rough coat of Black
which will be tidied up later on. The skin was given a coat of Citadel’s Cadian
Flesh. The smooth area at the top of the
chimney was given a coat of Vallejo’s Buff.

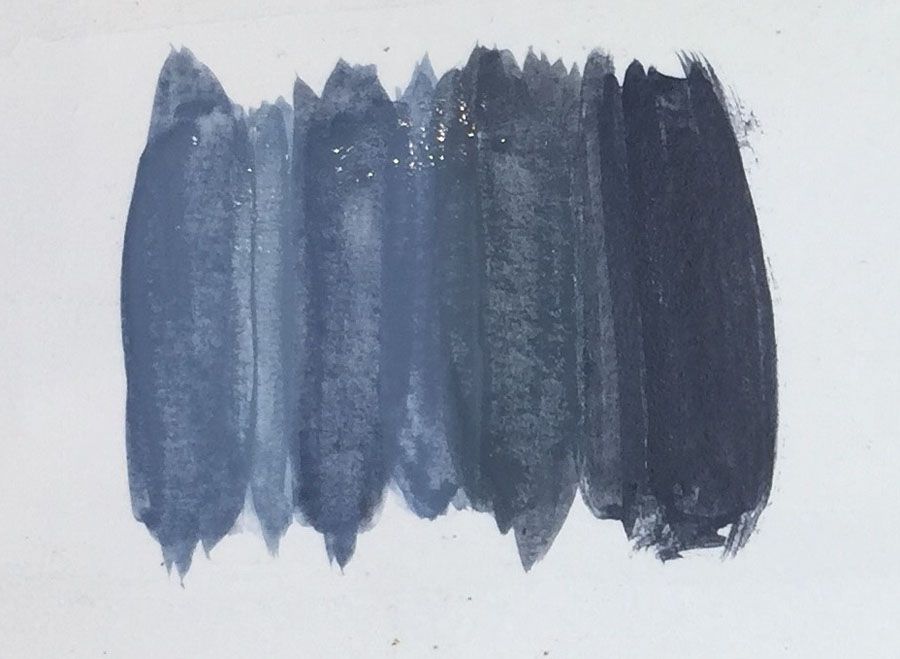
I prepared a few tones on the palette ready to paint the
cloak.
Starting from the left and going right we have:-
#1 - Fenris Grey
#2 - 50:50 Fenris Grey and Russ Grey
#3 - Russ Grey
#4 - 90:10 Russ Grey and Vallejo’s German Grey
#5 - 80:20 Russ Grey and Vallejo’s German Grey

shows the mixed tones #1 - #5

This picture shows how the shading works into the recesses
or folds of the cape and have been separated on purpose just for explanation. From left to right we have Mix #2 to Mix #5 only because Mix #1 (or Fenris Grey) is
only used for the extreme highlights.
Lay down the tones in order from the top
of the fold and work with darker tones towards the bottom of the fold and then
begin to work lighter up the other side of the fold. You should have the
makings of a nice transition in tones.

When laying down the tones as above you may have time to
blend the colours that are next to each other so you end up with a nice smooth
transition. If the tones are too far apart you can always make up intermediate
tones by mixing them together. Adding some retarder to the mixed paint can help a lot during this process.
Mix #2 is applied to the top of each fold.

Mix #3 is added a bit lower down each side of the fold and
while that is still dry apply Mix #4 next to it and try and blend them
together.

Mix #5 is added to the deepest part of the fold and blended
in to the previous layer. Mix #1 is applied to the very top of the fold, if you
need to apply another coat of Mix#2 directly next to it and blend together.

I shaded the jumper with a 60:40 mix of Warpfiend Grey and
German Grey and applied it to the folds on the arms at the elbow and above the
bicep and underlined the chest.

First highlight of the jumper with a 50:50 mix of Warpfiend
Grey and Slaanesh Grey

Second Highlight of the jumper using Slaanesh Grey.
Highlights should be at the top of the folds at the elbow, stomach and the top
area of the chest.

To add a bit of interest to the bricks I used Ammo by Mig’s
Streaking Grime Effect. Because it’s only a small area, using the grime effect
is a lot faster than preparing some oils.
This is an enamel based product so
I’ll be using a different brush. Use an older brush that has lost it’s point because
there is no need to be particularly tidy with it because it will stay’
workable’ for a while. Make some streaks and clean the brush in some enamel
thinners of white spirit.

Whilst the brush is still moist with thinners feather the
edges of the streaks, first on one side, then the other. This will leave the
streak slightly stronger in the middle. I also added patches of white using a
thinned down Ivory to look like the mortar had run down the chimney stack.

Exactly the same process using the streaking grime but on the smooth top area.

First highlight of the trousers using Scale 75’s Walnut
mixed with a little bit of Ivory. The belt was given a coat of Scale 75’s
Orange Leather.

I used a darker tone for the folds in the trousers by adding
some Scale 75’s Brown Leather to the Walnut.

Another highlight to the trousers by adding a little more
Ivory to the previous mix.

The belt was shaded using Brown Leather.

The belt was given a highlight using Scale 75’s Iroko

The Bat symbol was tidied up using Greman Grey mixed with a
little black to define the outside and then filled in with German Grey.

Using a thinned German Grey and Black mix I darkened the eye
sockets added a line either side of the nose and defined the shapes on the
belt.

I used a thin down black for the bottom half of the bat
symbol and feathered it out to get a slight transition from the top half. The
skin was highlighted with 50:50 mix of
Cadian Flesh and Kislev Flesh, then highlighted again by adding some Flayed One
Flesh to the mix.

Using Fenris Grey with a little Ivory, I picked out the lines on the forehead.

And the finished mini...


No comments:
Post a Comment